How Tenavia works, start to finish
The whole journey in one page: from creating a listing to a tenant paying rent, with a screenshot of every screen. Pictures show the demo listing, so every name is invented and the documents are watermarked; the screens are the real product.
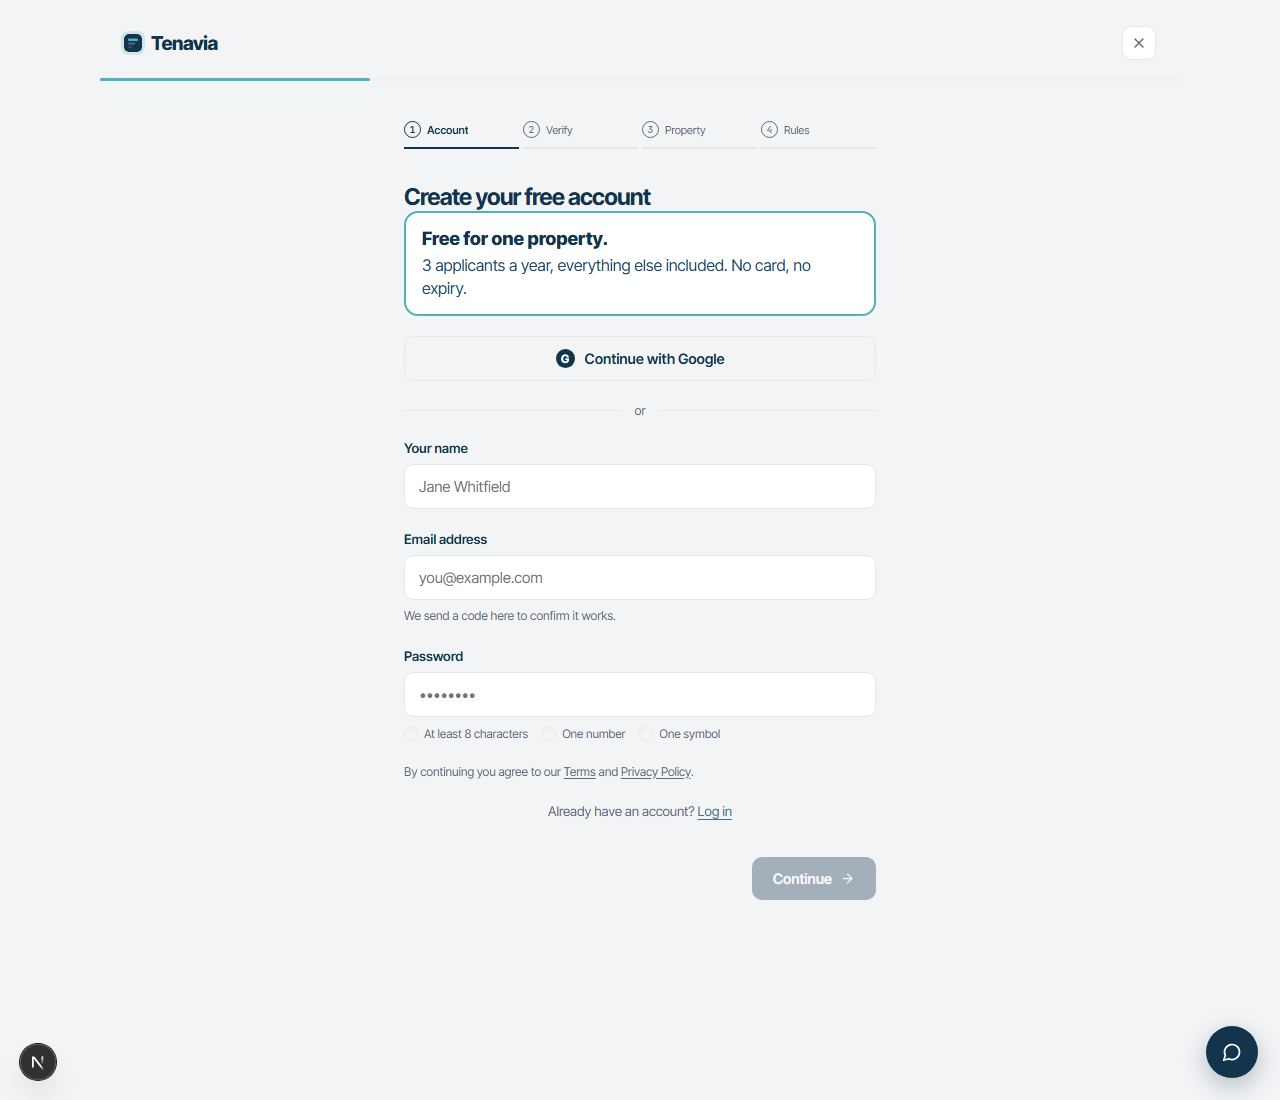
1 · Create your account and listing
Sign up with your email, then create your first listing: the address, the monthly rent, and your house rules (move-in date, pets, smoking, maximum occupancy). Those rules matter later: every applicant is scored against them automatically.
When the listing is created you get two links. The booking link lets enquirers pick a viewing time themselves. The screening link is where applicants complete their checks. You never need to build or manage either: they exist the moment the listing does.
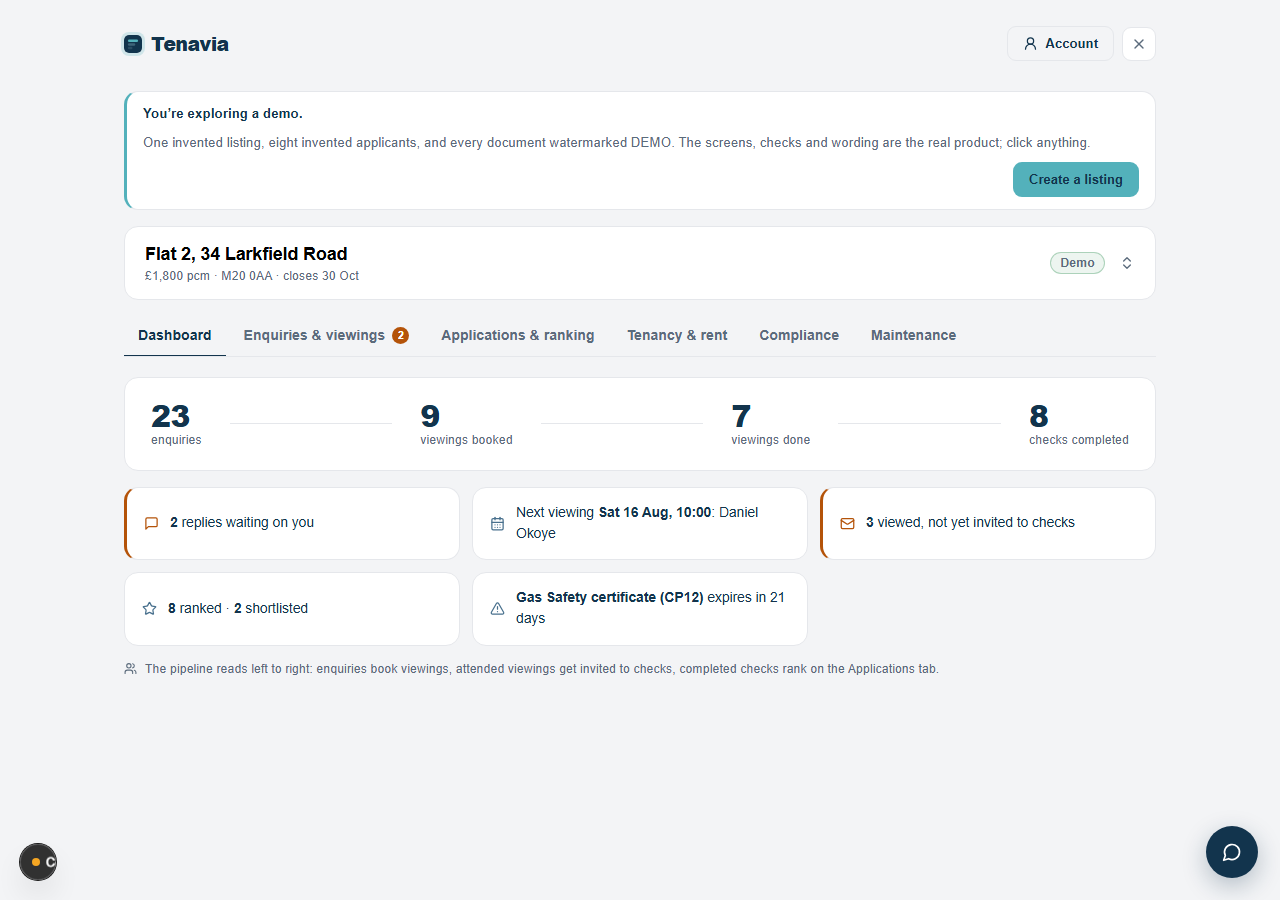
2 · Your dashboard: what needs you today
Each listing opens on its dashboard. The strip across the top is your pipeline: enquiries become viewings, viewings become completed checks. Below it, a tile appears for anything waiting on you, and clicking a tile takes you to the tab where the work happens. An amber edge means it is urgent.
If there are no tiles, nothing needs you. That is the point of the page: one glance and you know.
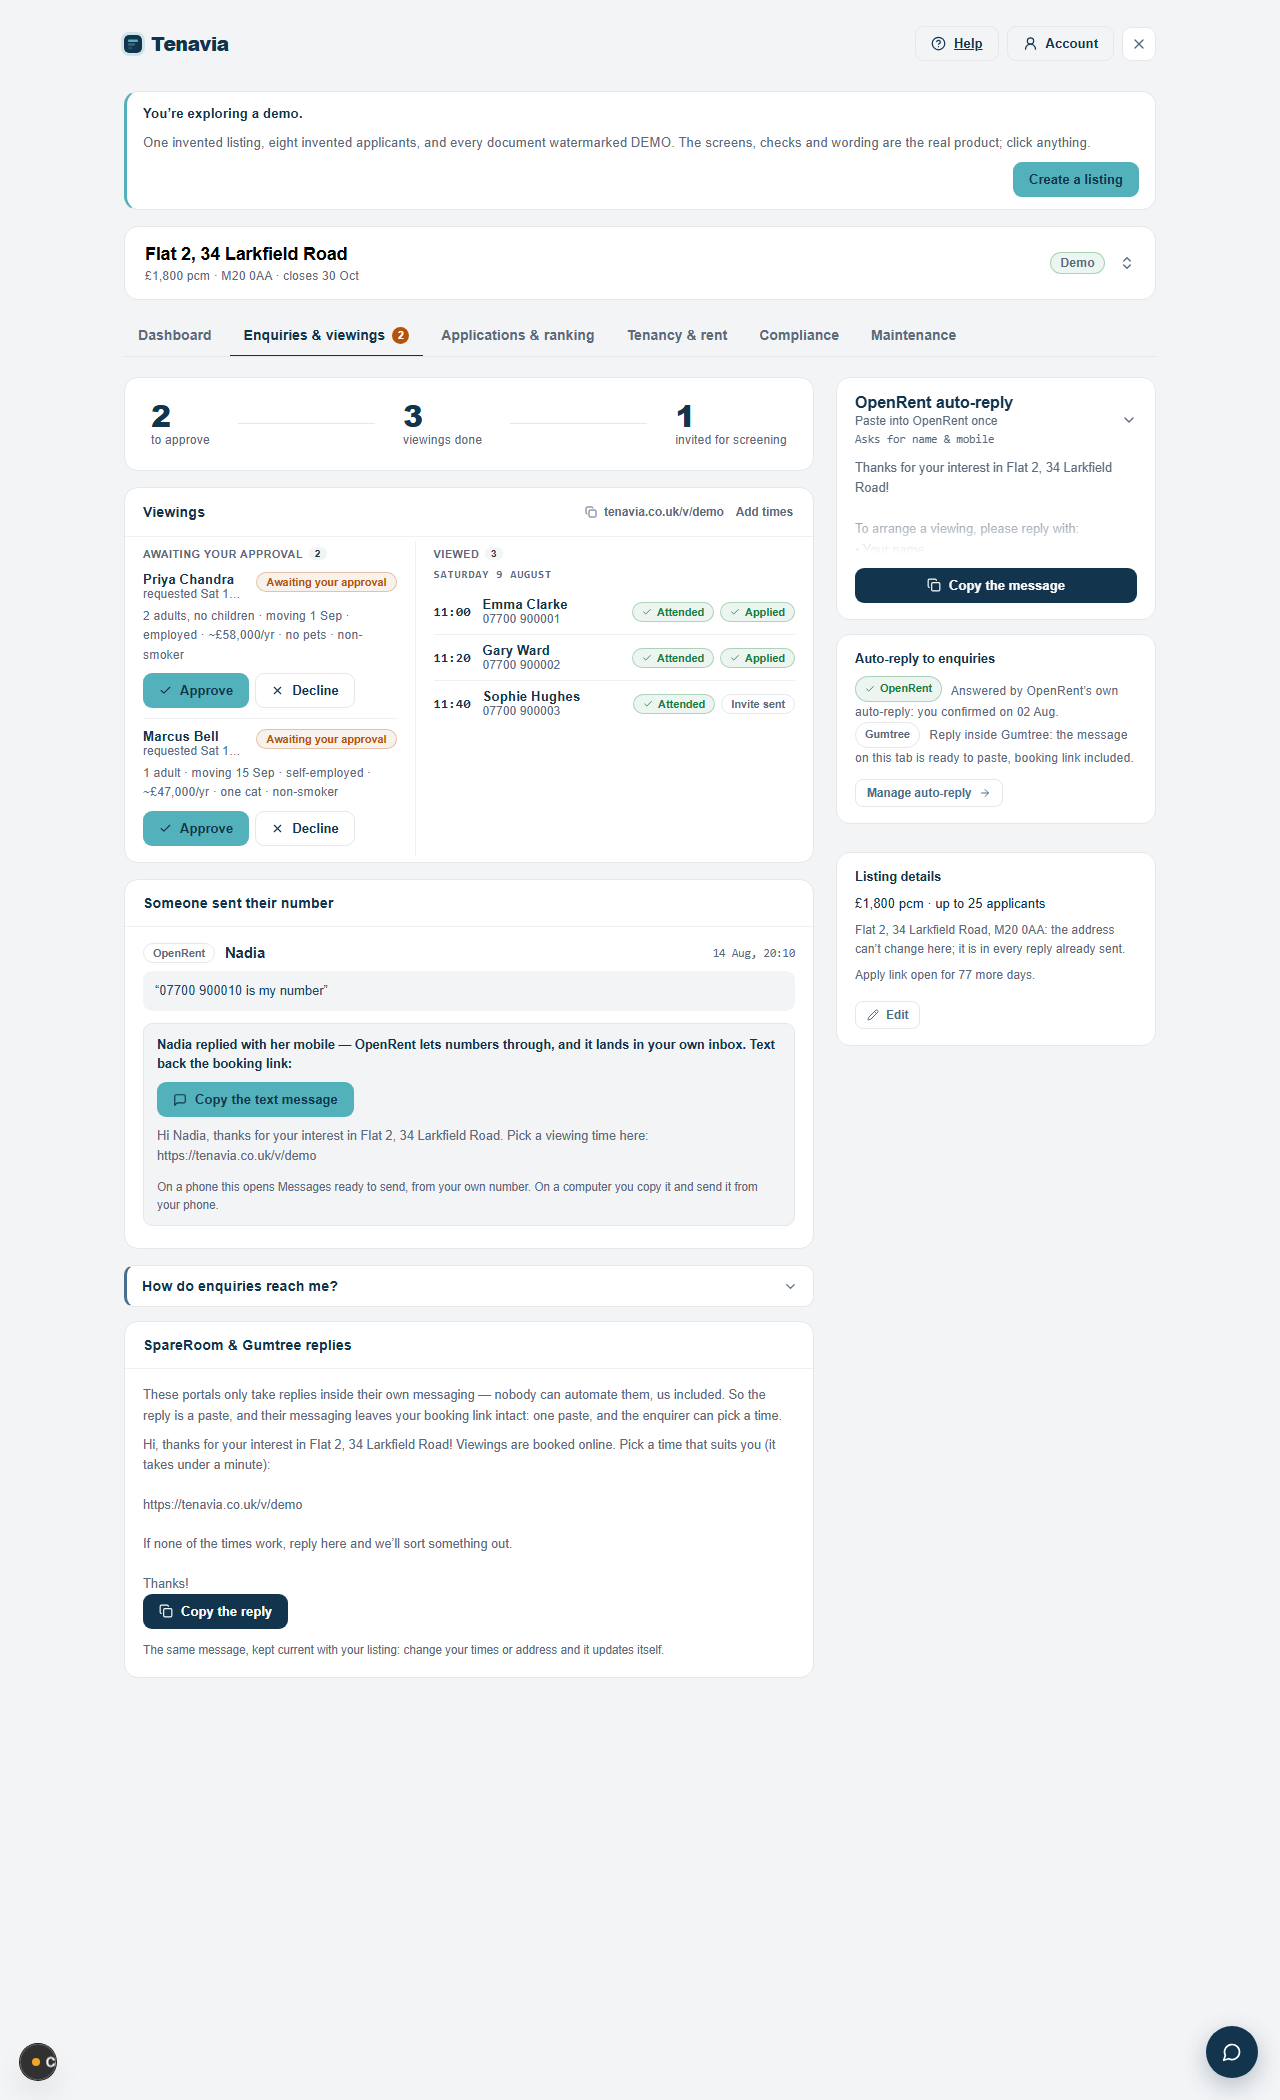
3 · Enquiries and viewings
Open viewing times with Add times (one afternoon, or a repeating weekly window). Then the reply you send each enquirer points them at those times, and each portal works the way that portal allows:
On OpenRent, their own auto-reply (set up once) asks each enquirer for their name and mobile number — the details OpenRent lets through. Their reply lands in your inbox as usual, and the text back is ready on this tab: on a phone, one tap opens your Messages with the booking link filled in, sent from your own number. On SpareRoom and Gumtree, which only take replies inside their own messaging, you paste the message from this tab into the conversation — their messaging leaves the booking link intact. Either way the link reaches them by a route the portal can’t strip.
Why not just send them a link on the portal? Because OpenRent removes links and contact details from messages and warns tenants against going “off-platform” — so a link there rarely arrives and makes you look evasive. Asking for a mobile and texting the link sidesteps all of that.
A note on privacy, because it matters: Tenavia never reads your inbox. Enquiries stay in your own mailbox — what lives here is the reply you send, your viewing times, and the requests people make through your booking link.
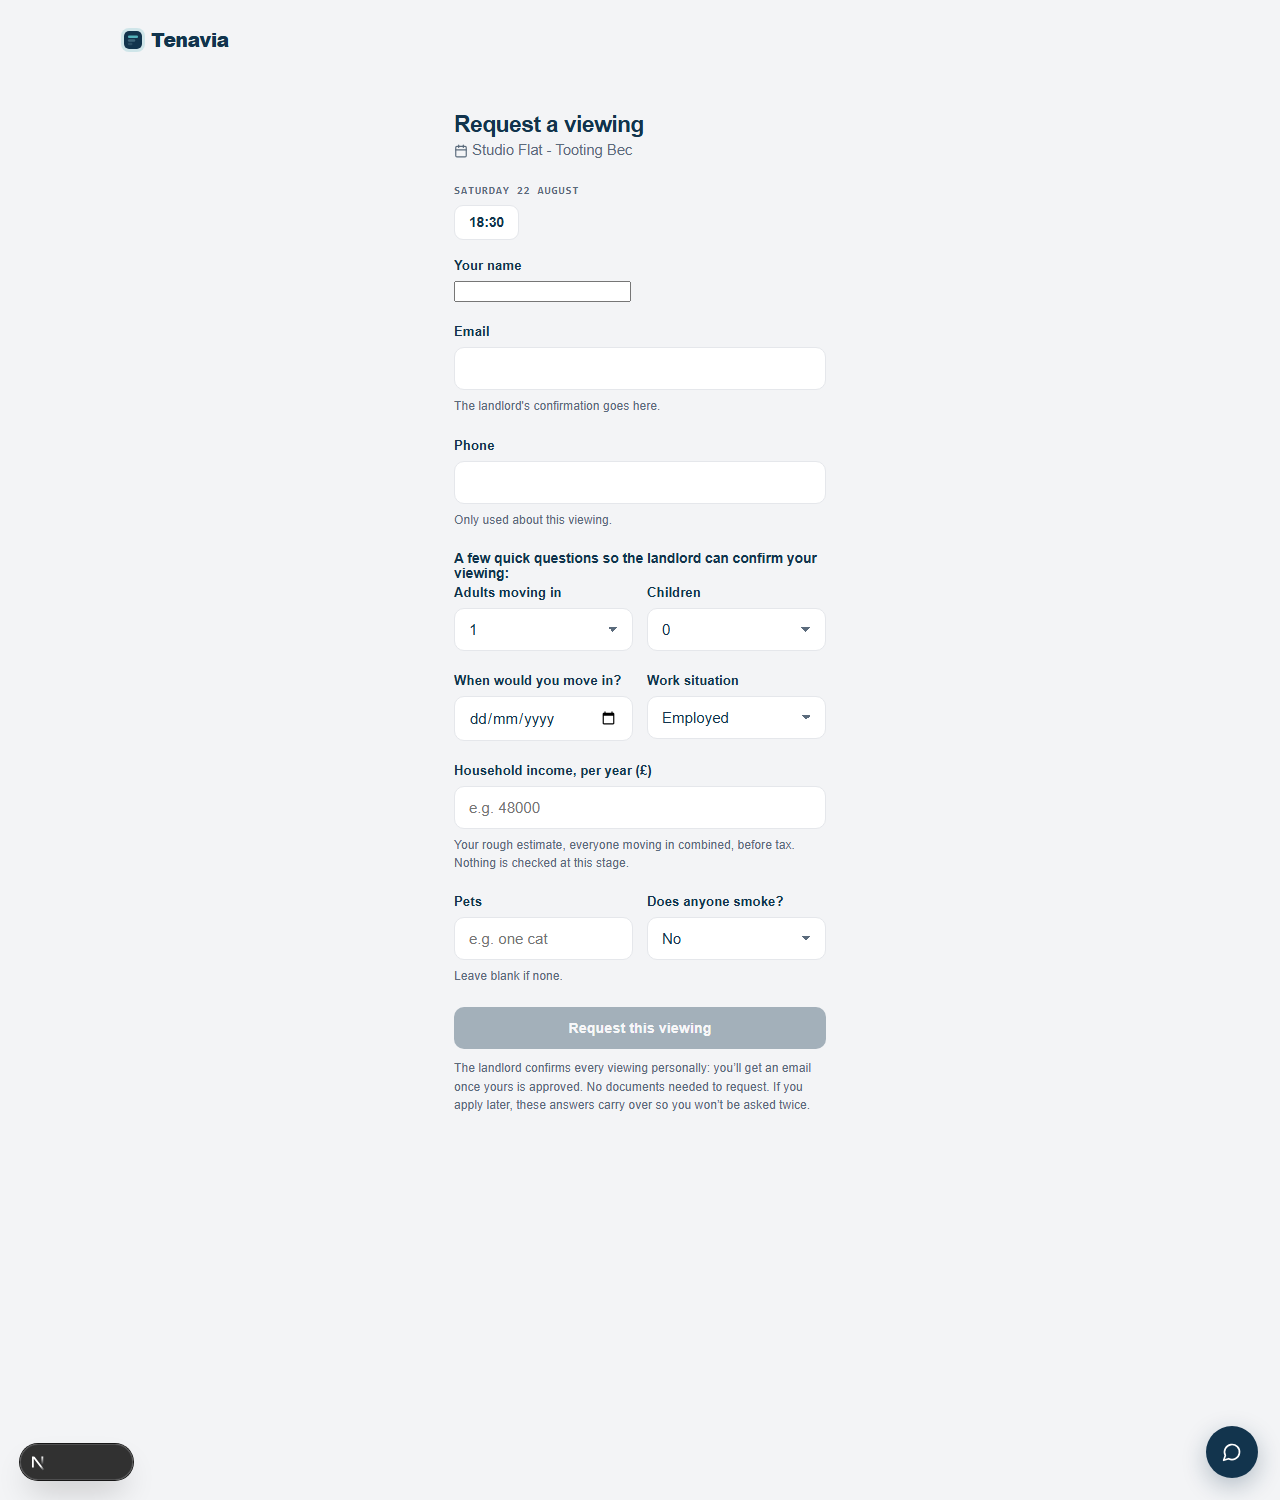
4 · Viewing requests you approve
When someone opens your booking link they pick a time and answer six quick questions — who’s moving in, when, their work situation, a rough household income, pets, smoking. Nothing that needs a document, and nothing is checked at this stage: these are just the things a landlord wants to know before giving up a Saturday morning.
Their answer arrives as a request, not a confirmed booking. It holds the slot and waits for you: on the viewings panel you read the answers and click Approve or Decline. Approving emails them the confirmation with the full address; declining frees the time and sends a short, neutral note. You decide every viewing — the questions inform you, they never judge anyone for you.
And it saves the applicant repeating themselves: if you invite them to screening later, these answers carry over and the form arrives pre-filled for them to confirm.
5 · Invite for screening
When someone has viewed and you want to take them further, click Invite for Screening next to their name (on the Applications tab, or right on the viewing row). They get an email with the screening link and a short list of what to have ready: their most recent payslip if employed, three months of bank statements, and a right to rent share code if they are not a British or Irish citizen.
You can also invite anyone by name and email, whether or not they booked through Tenavia: viewings arranged by phone or on a portal still funnel into the same checks.
Applying takes the applicant a few minutes. Their documents are read automatically and are never shown to you without their consent.
6 · The ranked shortlist
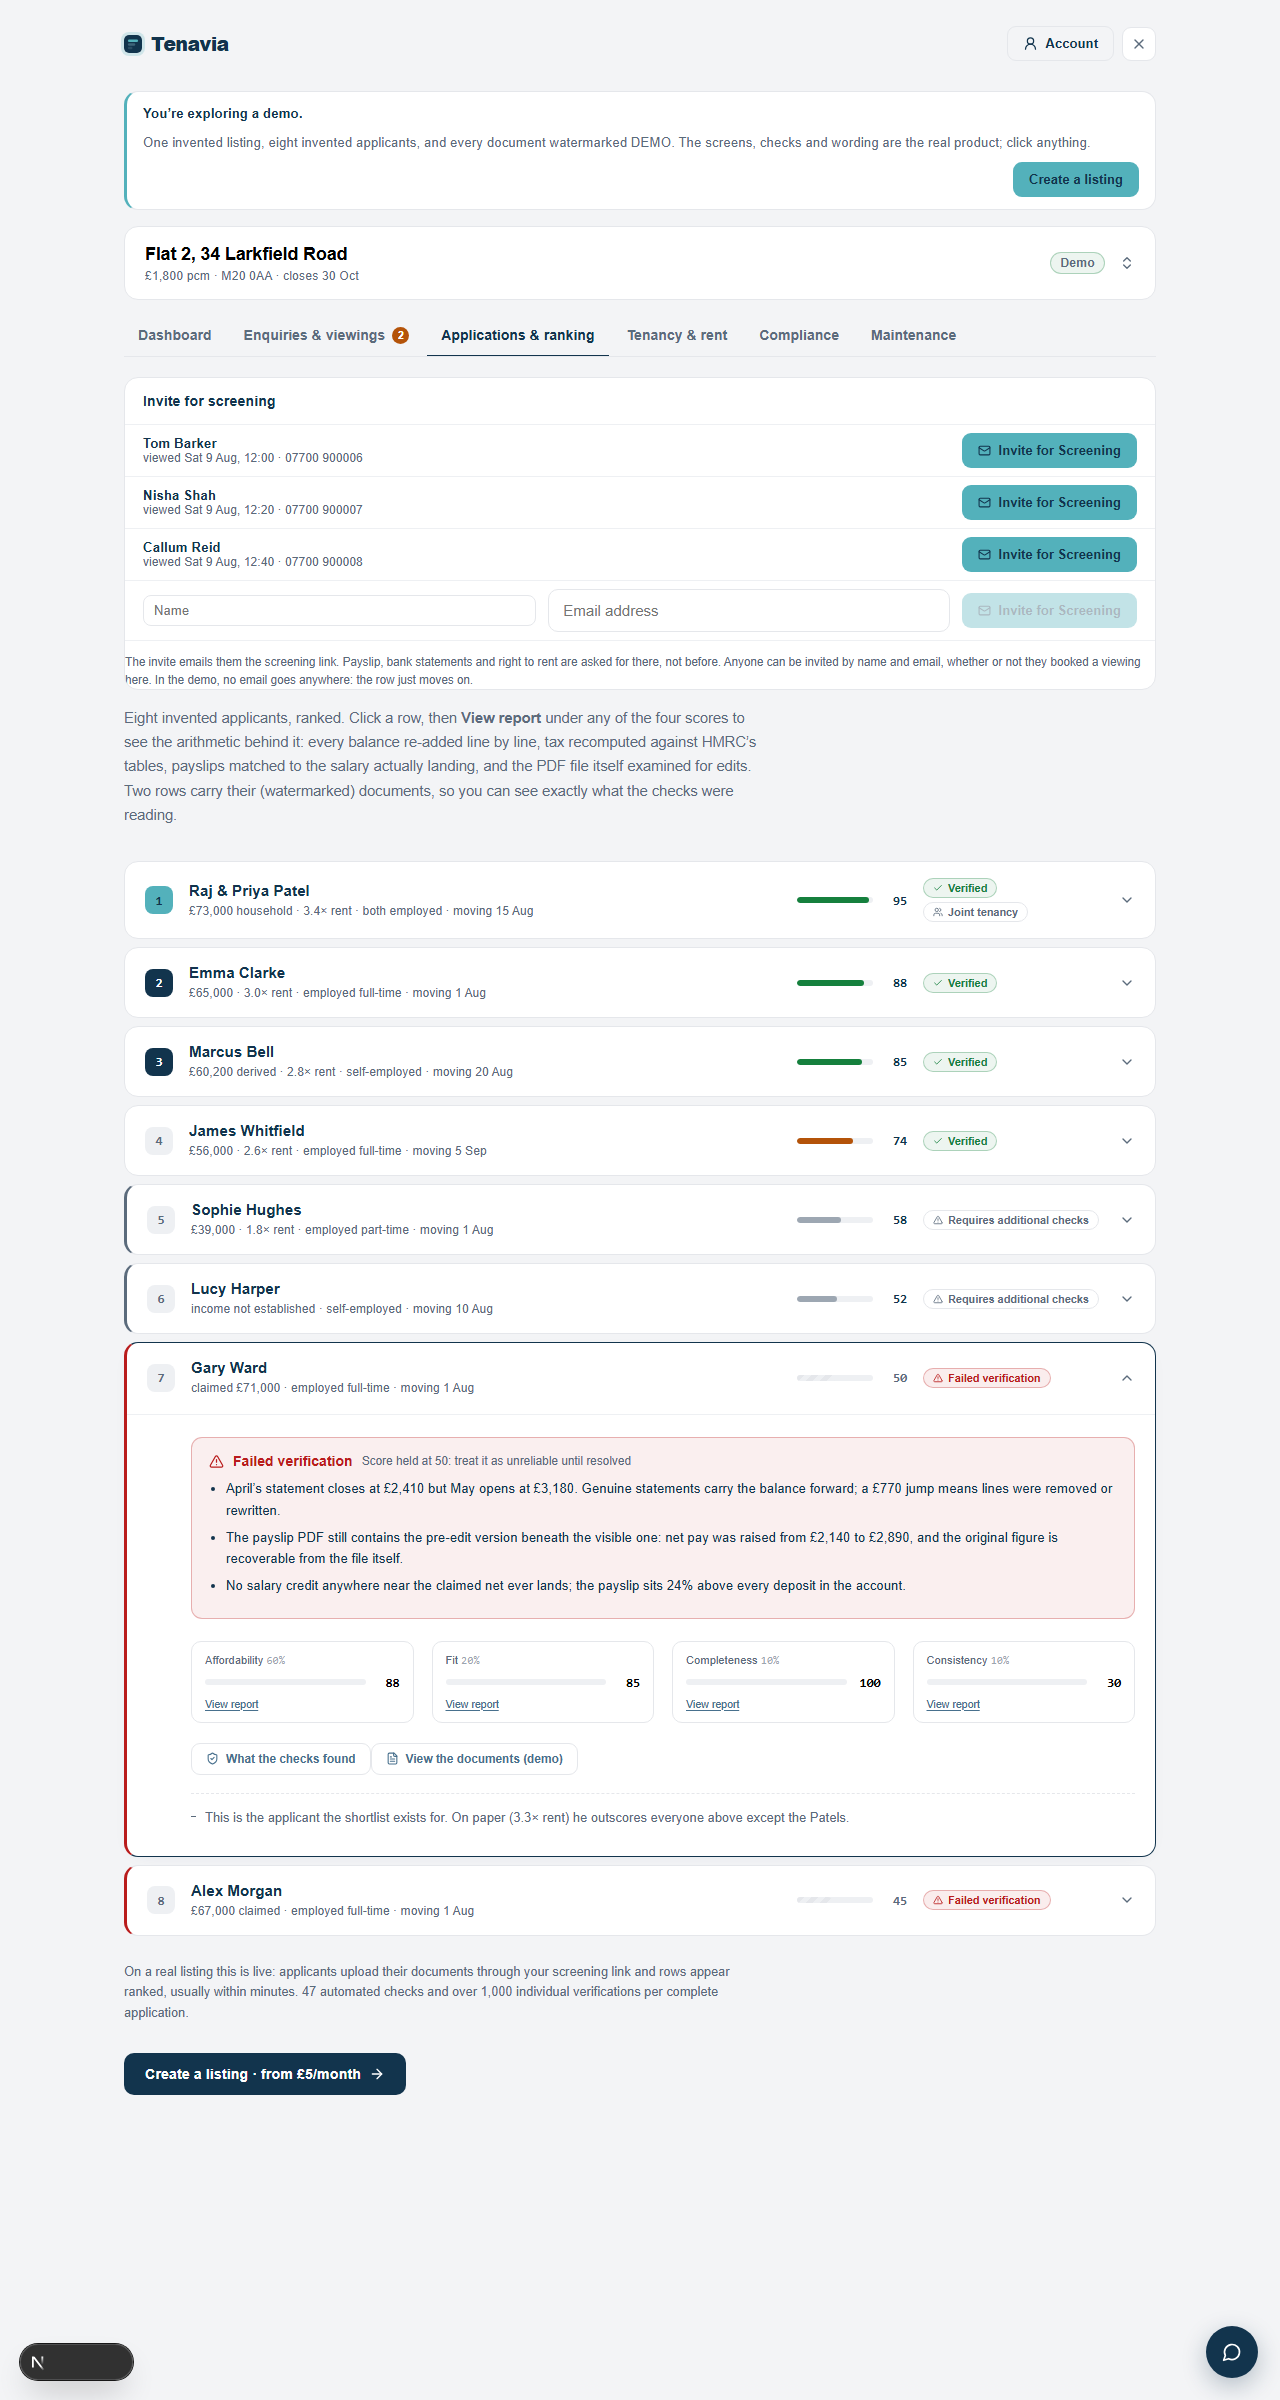
Completed checks appear as ranked rows, usually within minutes. Each applicant gets a score out of 100, built from four parts: Affordability (income against your rent, 60% of the score), Fit (your listing rules, 20%), Completeness (what they provided, 10%) and Consistency (whether their documents agree with each other, 10%). Click a row, then View report under any part to see the arithmetic behind it, step by step.
The badge next to the score is the verification verdict, and it is separate from the score on purpose. Verified means the documents passed every check that ran. Requires additional checks means nothing failed, but something needs your judgement (statements older than 45 days, a missing month). Failed verification means the documents contradict themselves: the score is held down and the reasons are spelled out in plain terms, like the row open in the picture above.
What the checks found lists every finding for that applicant. A pass is the absence of a finding: nothing in the documents contradicted anything else.
7 · Seeing the documents themselves
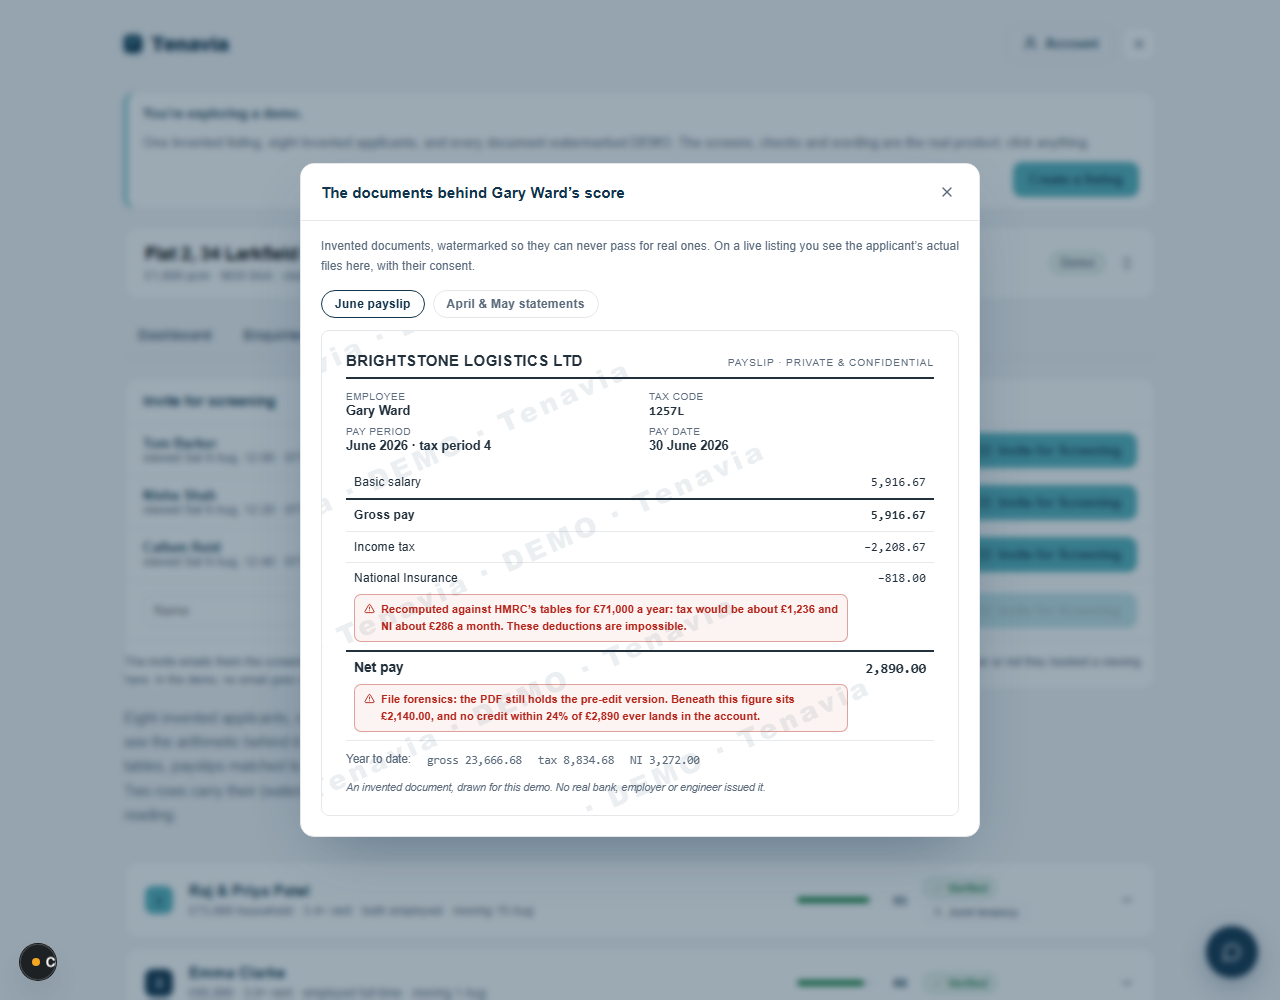
With the applicant’s consent you can open the documents behind a score. Findings are pinned to the exact spot they concern: in this example (from the demo, so the paper is invented and watermarked), the payslip’s deductions are impossible for the stated salary, and the file itself still contains the figure that was there before it was edited.
This is the heart of the product: you are never asked to trust a number without being able to see where it came from.
8 · After you choose: tenancy and rent
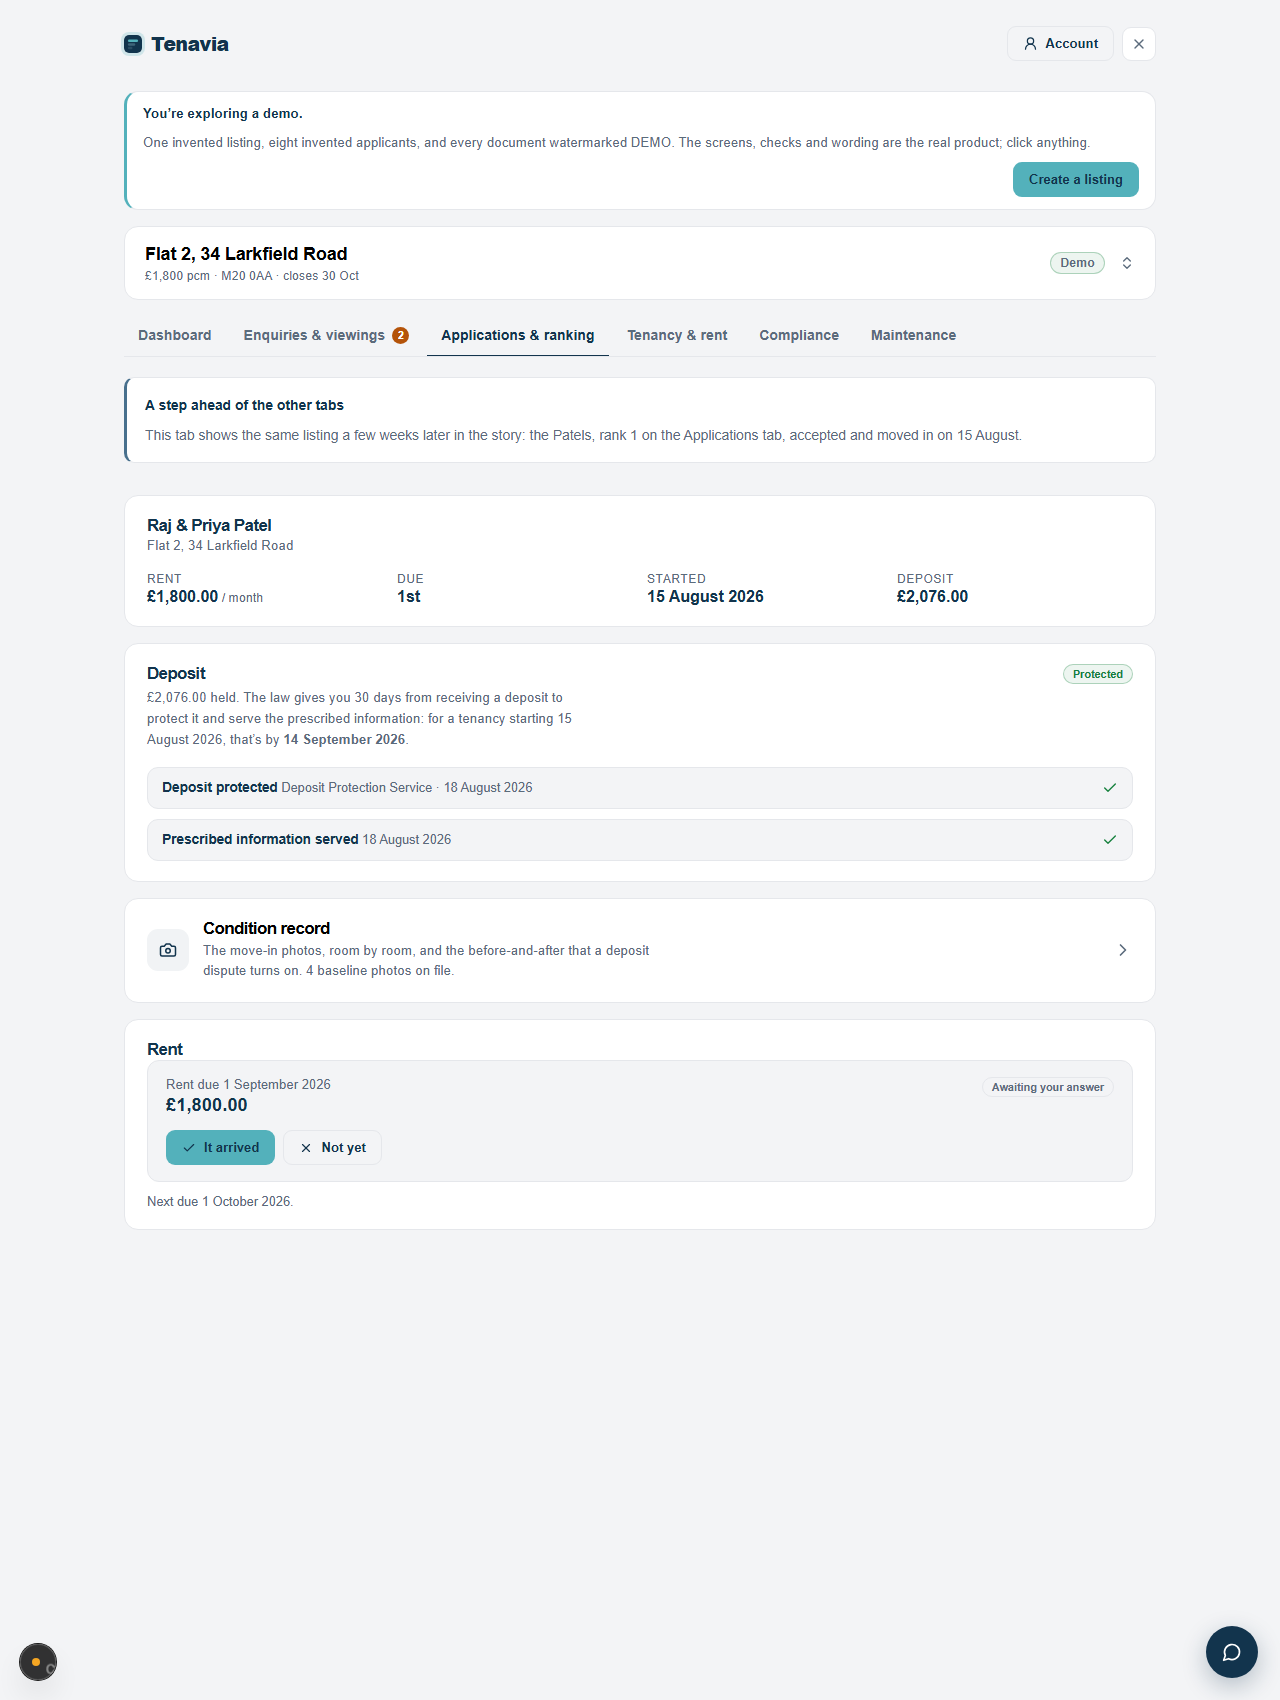
When a tenant moves in, record the tenancy on the Tenancy & rent tab: their name, the rent, the due day, the deposit. You can also enter a tenancy that already exists: nothing is sent to the tenant.
From then on, the day after each rent day you confirm one thing: did it arrive? One click a month builds a dated payment record. If rent has not arrived, ready-written reminder letters unlock in stages, from friendly nudge to formal notice, each sent in your name with replies coming to you.
The deposit card tracks the legal 30-day clock for protecting the deposit and serving the prescribed information, and holds your confirmation of both: the paper trail a dispute asks for first.
The Agreement & documents card keeps the signed tenancy agreement, any addendums and the deposit certificate. Each file is fingerprinted the moment it arrives and never edited afterwards; if the terms change, add an addendum rather than a corrected copy, so the original stays exactly as signed.
One habit worth keeping for anything outside the platform: save originals, not screenshots. A screenshot of a text or a photo only proves when the screenshot was taken. Export the real thing instead — the photo file itself, an email saved as a file, WhatsApp’s “Export chat” — and keep it with the tenancy’s paperwork.
9 · The condition record
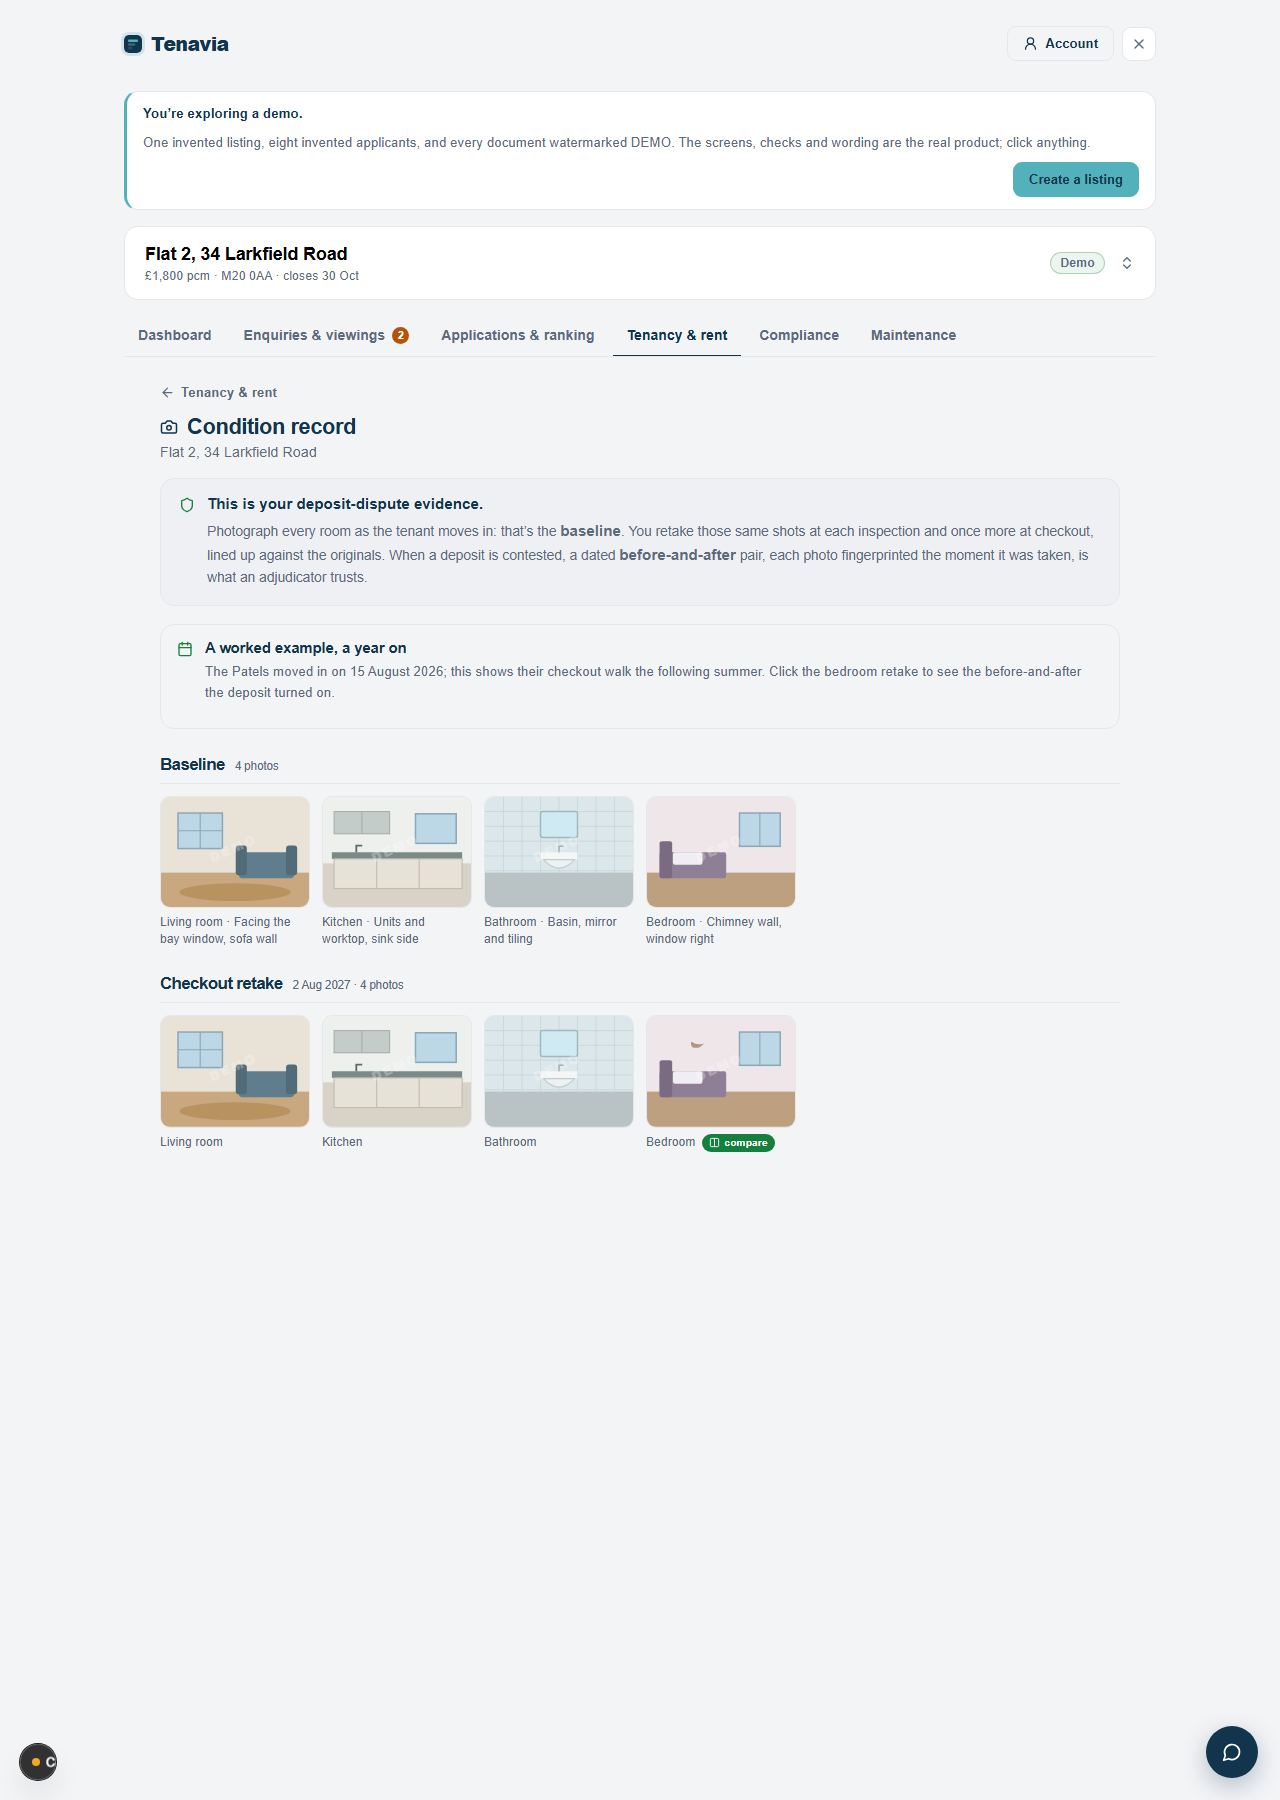
Photograph each room at move-in, from your phone, straight into the listing. At the end of the tenancy, photograph the same rooms again: the before-and-after pairs are what a deposit dispute actually turns on, dated and in one place instead of scattered across a camera roll.
10 · Compliance
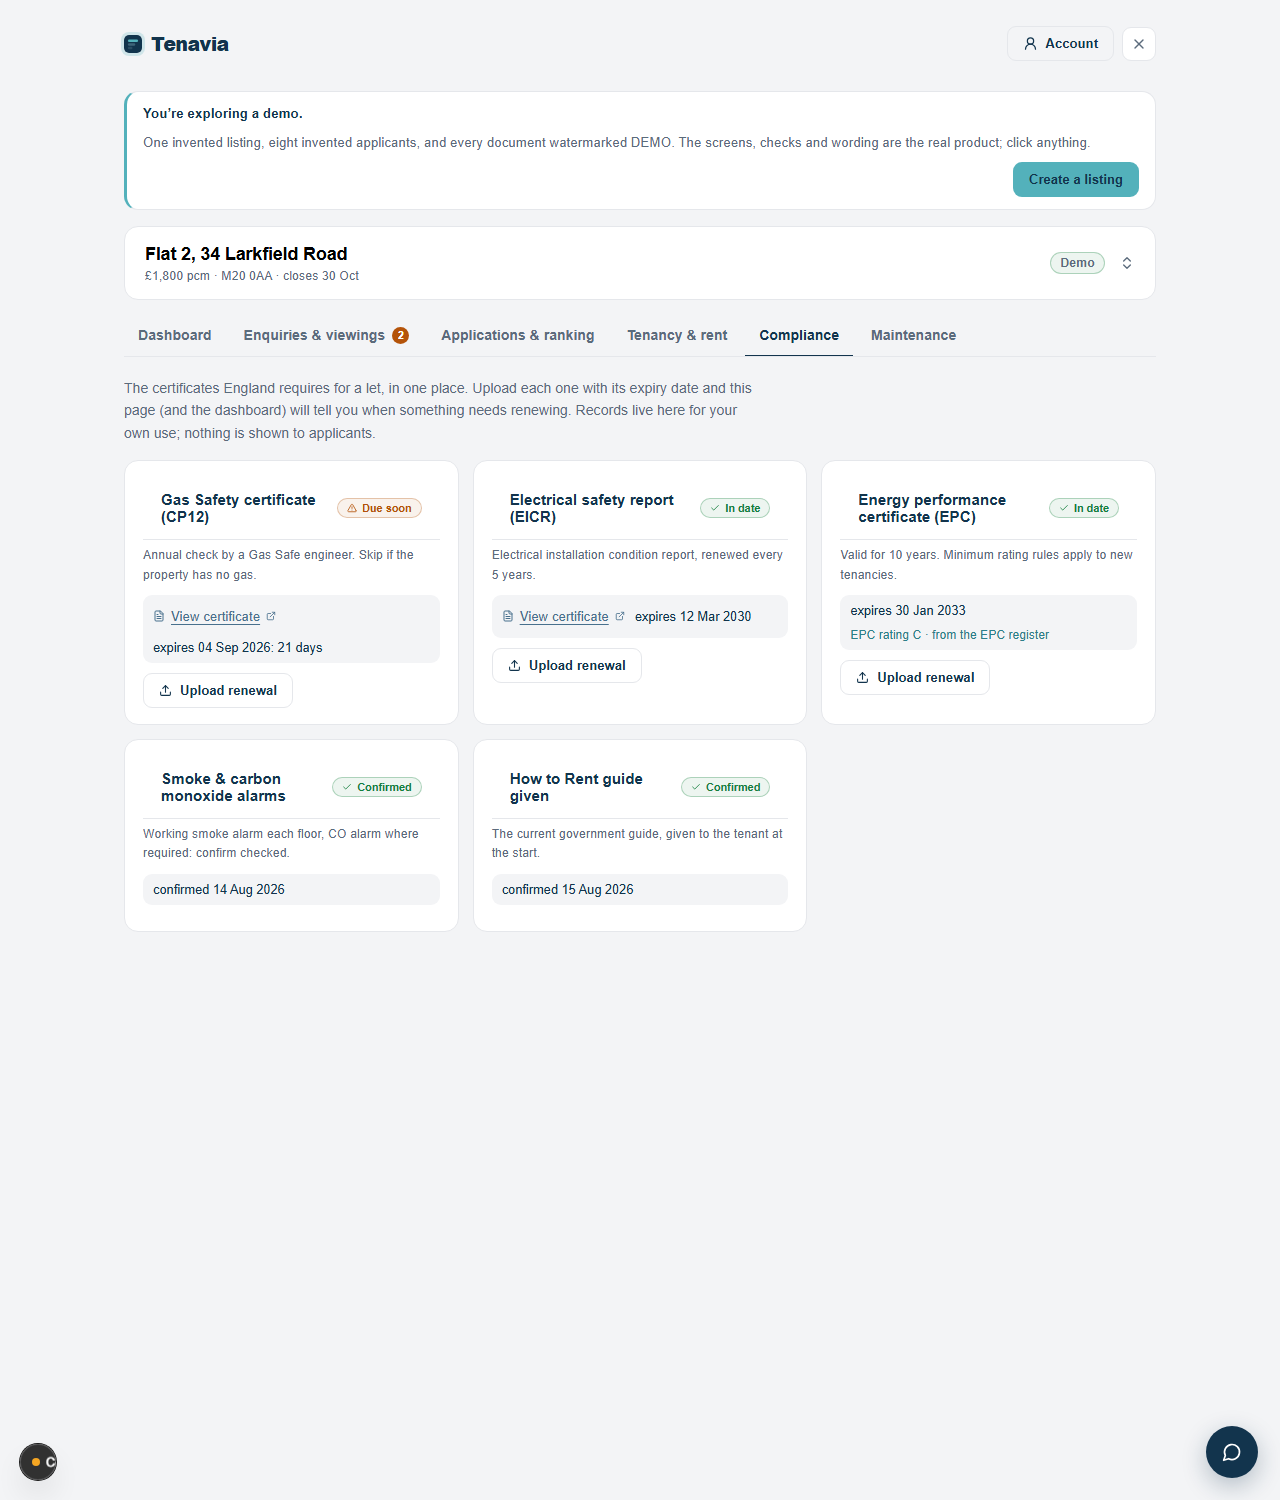
The certificates England requires for a let, in one place: gas safety, electrical report, EPC, plus confirmations for alarms and the written statement of terms (the document that replaced the How to Rent guide in May 2026). Upload each certificate with its expiry date and the dashboard warns you at 60 days, 30 days and 7 days before anything lapses. The EPC can usually fill itself in from the public register: no upload needed.
Records live here for your own use. Nothing on this tab is shown to applicants.
11 · Maintenance
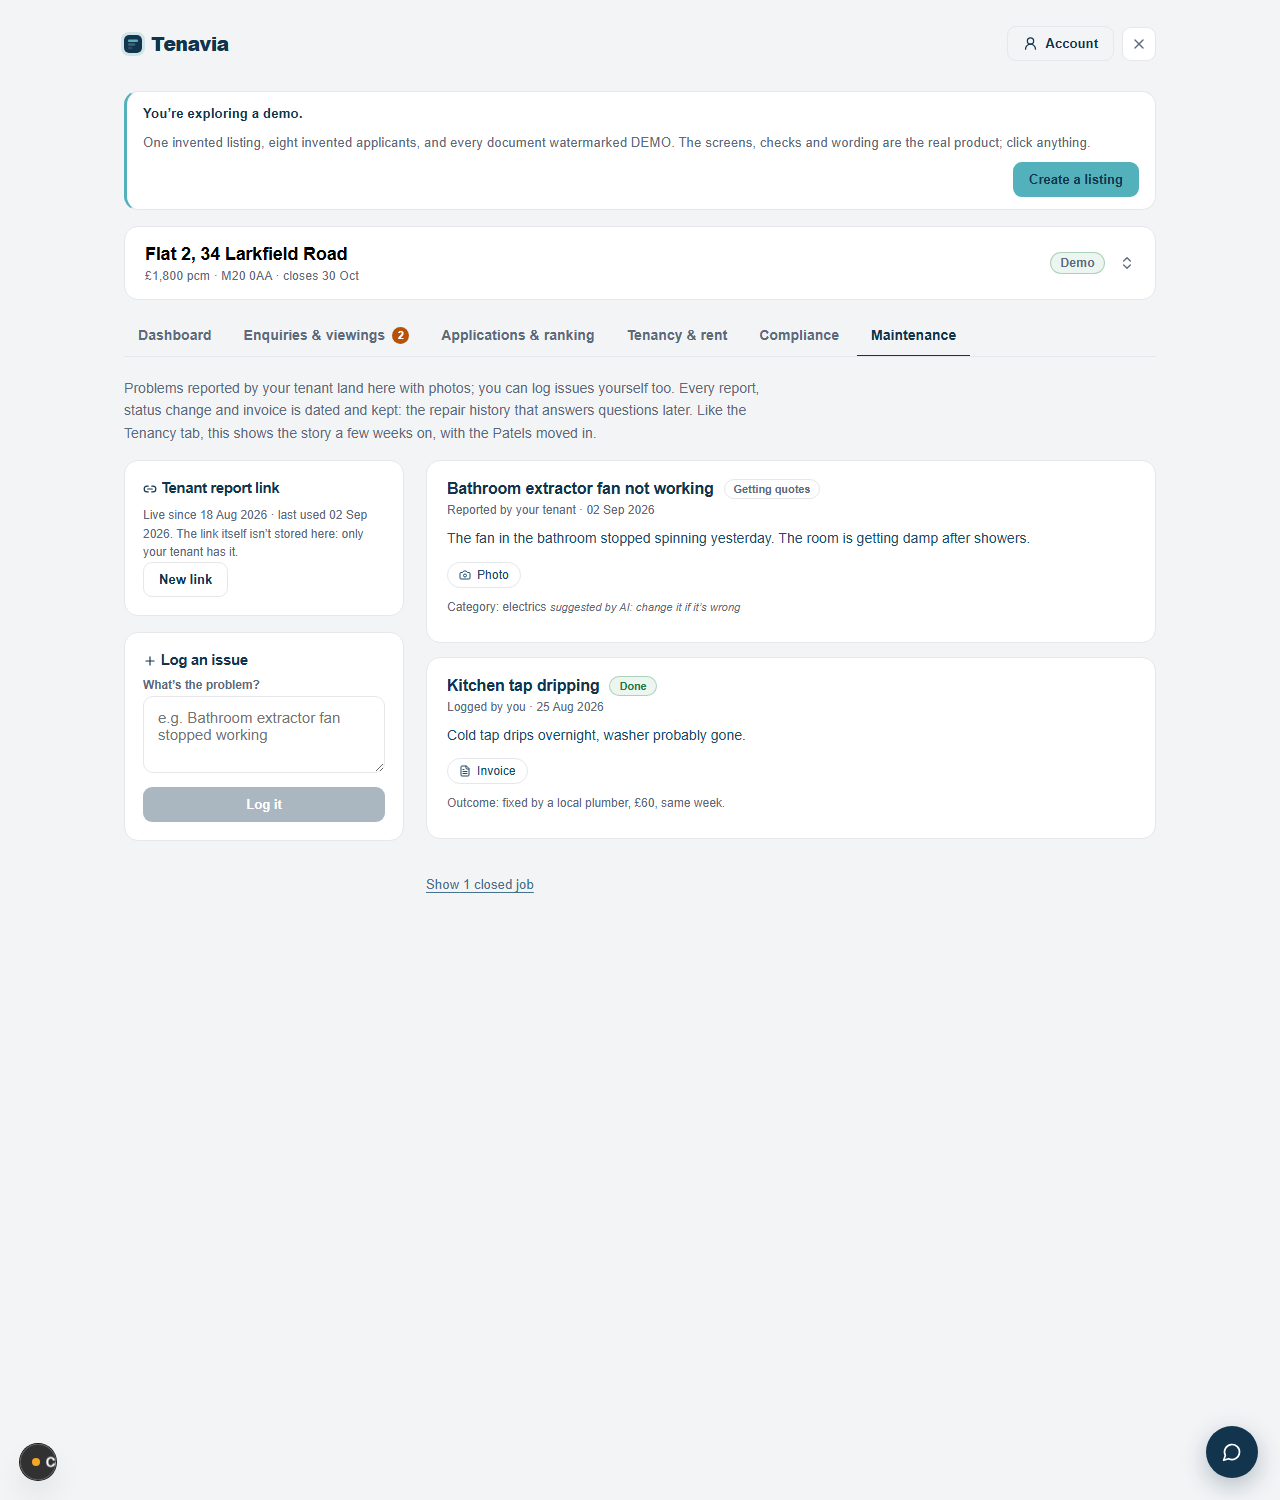
Create a tenant report link and text it to your tenant once. When something breaks they report it there, with photos, and it lands on this tab. You can log issues yourself too. Every report, status change and invoice is dated and kept: the repair history that answers questions later.
If a tenant reports something dangerous, a gas smell above all, the report form puts the emergency number and your phone number in front of them before anything else. Some problems should not wait for a dashboard.
12 · Plans and billing
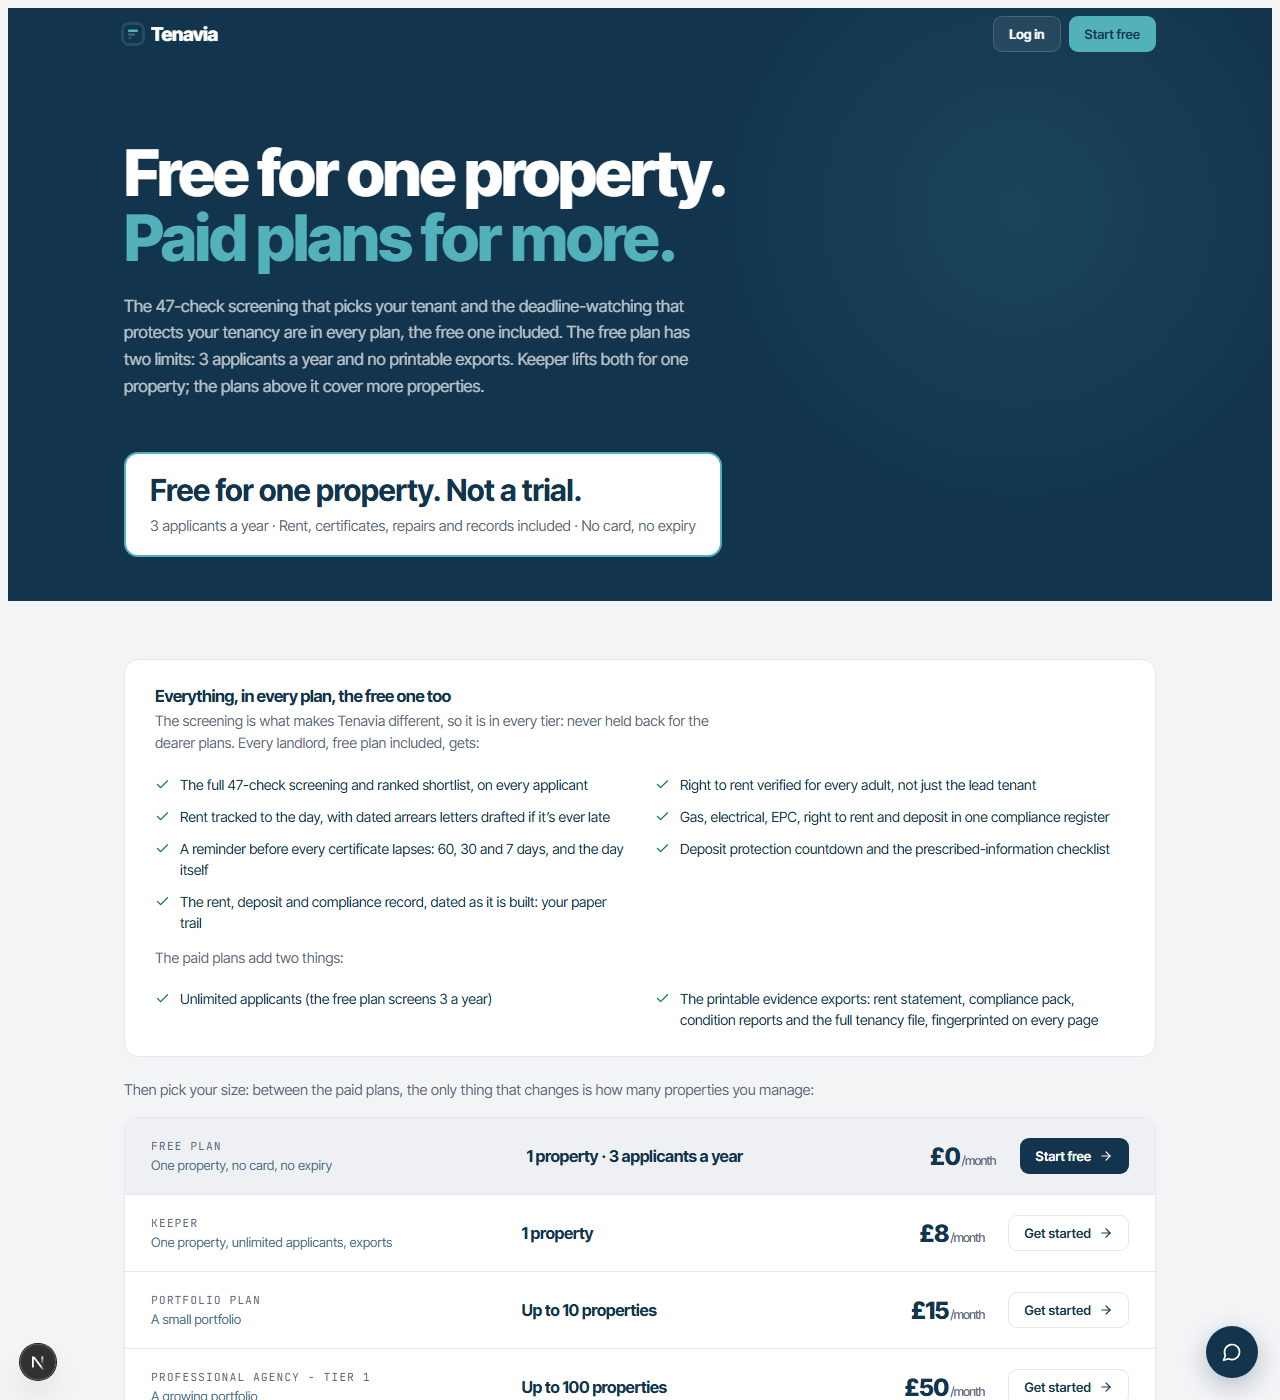
One property is free, with no end date: 3 applicants a year screened, and everything else included, with no card. Keeper, at £8 a month, adds unlimited applicants and the printable evidence exports for that property; the plans above it are priced on how many properties you manage, and every one includes everything: screening, rent tracking, compliance, maintenance and the exports. Manage your plan, invoices and card under Account, top right of any page.
13 · Stuck?
The chat bubble in the bottom-right corner of every page reaches us directly, or email contact@tenavia.co.uk. And if you want to try anything risk-free first, the demo dashboard is a full copy of everything in this guide with invented data: click whatever you like, nothing is saved.
Screenshots are taken from the demo listing and refreshed as the product changes. If a screen you see differs from this guide, the product is newer than the picture: the chat bubble will get you a straight answer.